Knowledge Base Help Center
IVR – Using the Passive Camera
It is very common to have specific situations of real-time recording, which demand, instead of using a camera with a pre-defined behaviour, we have to specify its behavior in a customized way.
The Cameras used for this are called Passive Cameras in the Plug-in.
This means that, for example, instead of animating its behavior, or regulating its movement time, we need a camera in which we can change its position and orientation without any type of lock or rule.
That is, we will define its behavior and change the system so that it behaves in the way that suits us best.
For example, in the game developed by Unreal for learning (Racing Car Game), we have a Buggy , in which your Blueprint can be used to make a customized recording from the point of view of the moving car.
The Camera Actor
The IVR_CameraActor camera is considered a passive camera because it doesn’t do anything until some routine stimulates its function.
For example, if you need to perform some positioning of this camera, make it go some way, or even start/stop its recording. Everything will be up to you.
This does not detract from the importance of this camera in the system, as all other types of cameras use an internal passive camera to carry out their activities!
The biggest importance of this camera is because it is devoid of BeginPlay and Tick events. That’s right!
In the first versions of the Plugin, through feedback from license holders, many adverse situations occurred when trying to use the camera in Blueprints already developed and with a very large hierarchy of functioning!
For example, we do not always have the ideal situation of being able to create a Player inherited from the IVR_CameraMan class, since in the game there is already a base class, and it is “tied” with many important routines for the game to work, that is, several Problems can happen, from keyboard mapping conflicts, to unexpected camera behavior due to a hierarchical Character move.
Therefore, in a simplified way, using the functions included in this camera, it is possible to create it in the Level and access it within your blueprints, without any incompatibility.
That’s why the Buggy example is so important, because it shows the flexibility of integrating and decoupling it, without major problems.
Finally, to be able to use this camera, it is necessary to carry out two steps:
- Register the camera in the Low Level Recording System(Usually Made at BeginPlay).
- Attach the Transform and Recording functions at your blueprint Tick Event.
Step 01 – Registering the camera
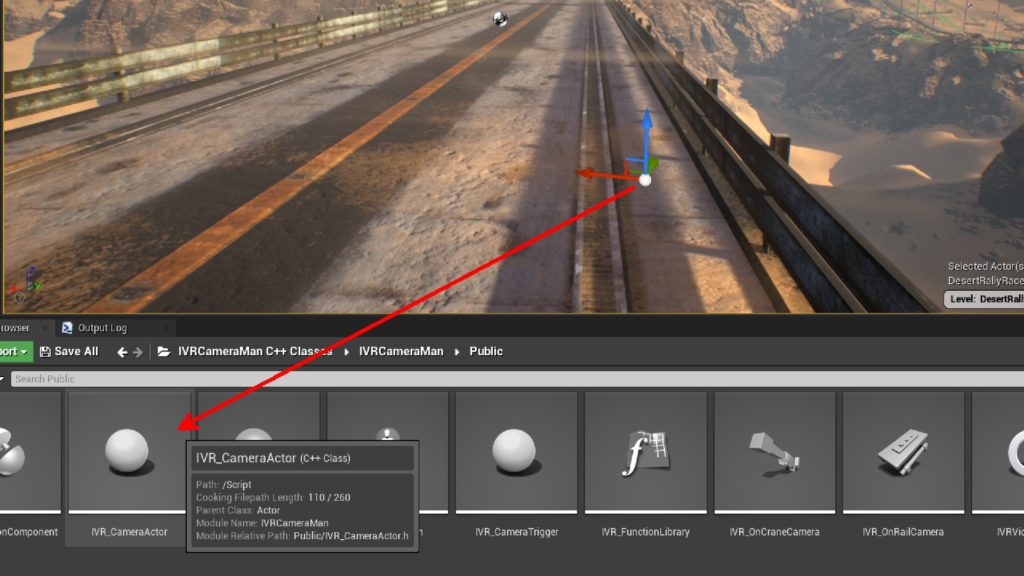
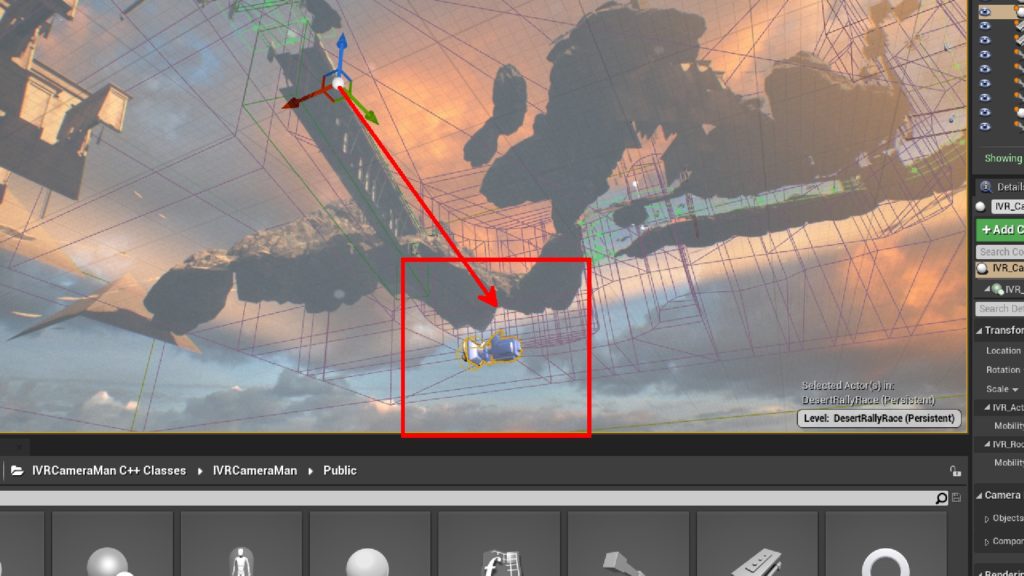
To use a passive camera in your system, Just drag and drop the camera on the Level , pay attention that this object is considered an “invisible” blueprint, as it doesn’t even have a Mesh to represent it, and as it lacks BeginPlay, not even its initial position is made (If looking at the real position of the camera, you will see that it is at the Origin of the World.


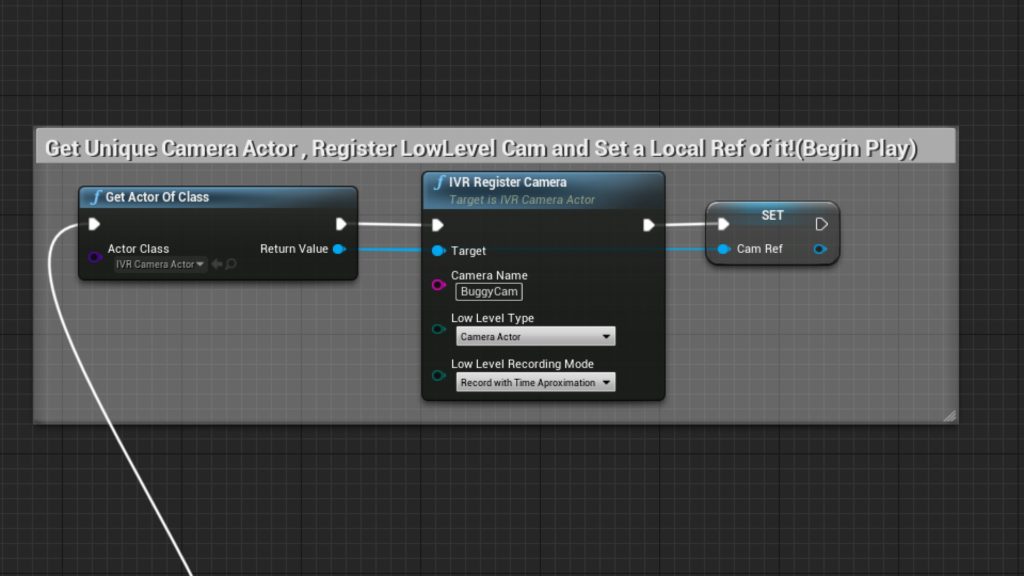
Now that you already have a passive camera in your Level, just include the camera registration routines in your blueprint. The most common camera registration event is in BeginPlay, but the best place to develop this is up to you.
Just copy the functions shown in the image below and everything will be OK!

Step 02 – Putting the Camera to Work!
Finally the last step, and the simplest of all, is to put your passive camera to work!
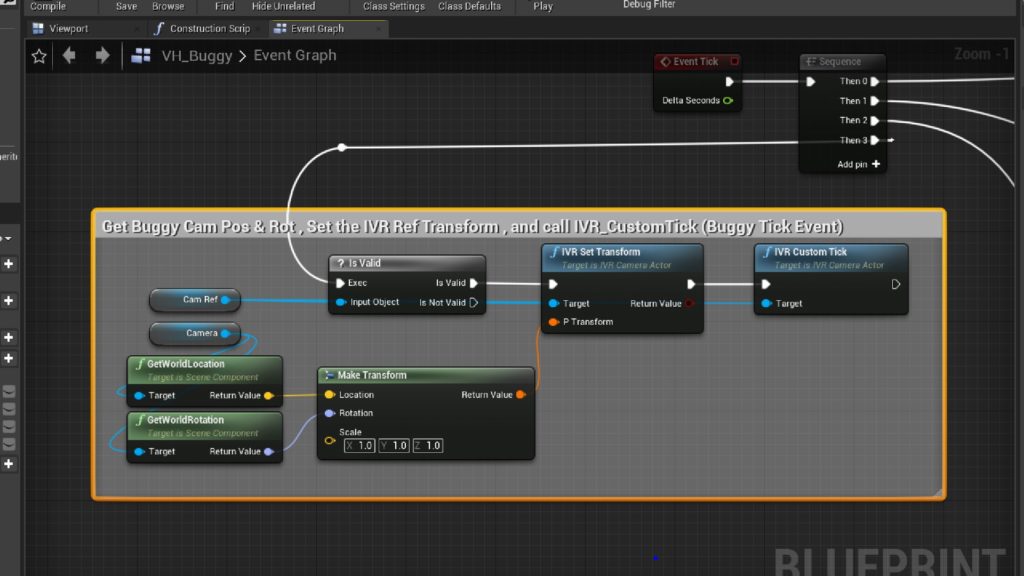
For this, the best place to do it is in the Tick event, but this is not necessarily mandatory if you want the camera to record few frames, or for the position update to occur in a few moments. Again, it’s up to you to choose the best place to call these routines.

In the case of this example, the recording will be based on the movement of the camera itself included in the Buggy’s blueprint, that is, at each Tick event, we take the position of the Buggy’s game camera, update the recording camera transformation and execute a Tick custom (Function only available in this class).
Camera functions
All functions available on a passive camera are listed in the table below for future reference:
| Function Name | Description |
|---|---|
| IVR_StartRecord | Enables the camera to start record the video. |
| IVR_StopRecord | Blocks the camera to record the video. |
| IVR_CustomTick | Executes a Custom Tick. (Record a single frame) |
| IVR_SetTransform | Updates the current camera transformation. |
| IVR_RegisterCamera | Register the camera in the Low Level system. |
