
Knowledge Base Help Center
IVR – Using the On-Crane Camera
The new IVR On-Crane Camera is very useful to achieve an excellent result in the creation of cinematics in real time.
This type of camera is quite common in TV shows and events with live coverage, where the camera man can control the distance, angle and direction of the camera according to his need. The camera itself is attached to a pin at the end of the Crane.
Different from what happens in real life, we used the idea of the crane camera to create a way to create a sequence of camera movements, which can be used anywhere and together with the animations performed in production, reaching unique cinematics that would hardly be possible with the usual recording of a game play or cinematics produced in a common video editor using keyframes. (An example of this is the car accident below in the video).
The On-Crane Camera
Simply put, the new camera mixes the concepts of a normal crane, with the advantages of changing these parameters in real time to achieve impressive results when finished.
As a result, several other usage parameters emerged that were integrated and made available for direct access via Blueprints.
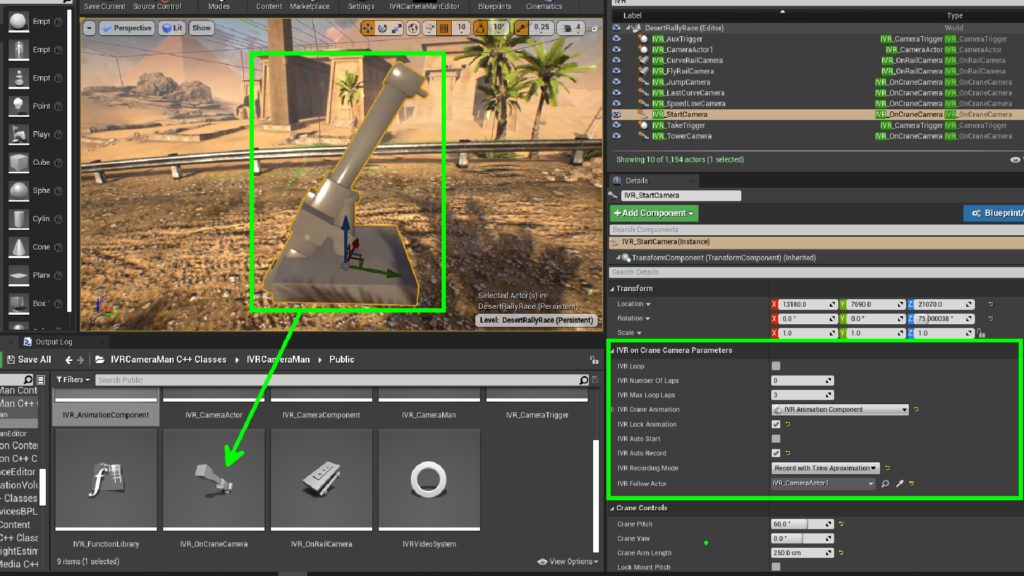
The IVR On-Crane parameters
To control the behavior of the camera, its parameters can be used according to the expected recording situation, and it even allows us to repeat these animations in a loop.
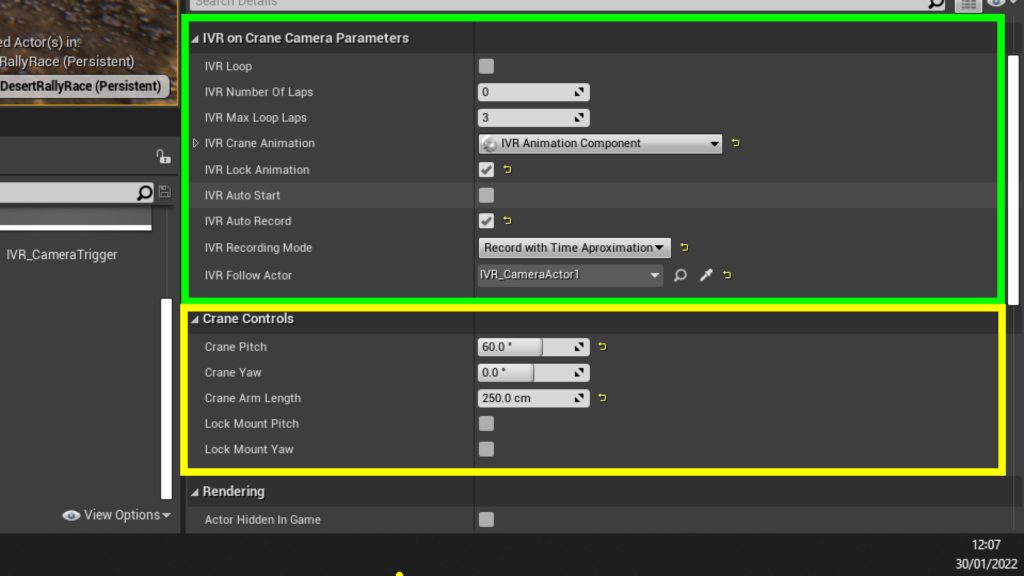
IVR Camera Parameters:
- IVR Loop – Enable Animation Loop
- Number of Laps – Inform the number of Expected Animation Laps
- Maximum Loop Laps – Inform the Actual expectation Laps.
- Crane Animation – Custom animation with a Vector UCurve to be used in the Animation.
- Lock Animation – Lock the animation (Static Crane)
- Auto Start – Automatic Start Record on the Begin Play
- Auto Record – When stoped or animation end , the camera record the take video.
- Recording Mode – The type of the recording in the Low Level Camera.
- Follow Actor – Specify an Actor to Follow (Direction of the Camera View).
Normal Crane Parameters:
- Crane Pitch – Increase/Decrease Pitch.
- Crane Yaw – Increase/Decrease Yaw.
- Arm Length – Increase/Decrease Length.
- Lock Pitch – Lock the Pitch
- Lock Yaw – Lock the Yaw.
Some parameters may seem redundant at first glance, but in some real-time situations they become important, as in the case of the accidental jump. If this car hadn’t hit the bridge, the animation would take less time and could generate unwanted animations during the take.
Therefore, there are some rare situations that occur in this type of recording that can be controlled using these parameters, in the case of the car jump camera, if the jump is successful we reduce the maximum number of loops to zero, otherwise to 3 and so on. we avoid recording interruption until the car can make the final turn(With recording interruption trigger).
Finally, the golden rule about the parameters of an On-Crane Camera is, try to use them according to the shot being taken and run them several times in debug mode until you get the expected result.
The Animation Parameter
For the camera animations to work, an actor component for animations was developed, exclusive for this type of camera.
Within this component and to make it possible to edit these animations in the Unreal editor, we chose to provide an attribute that receives this type of asset (Vector UCurves).
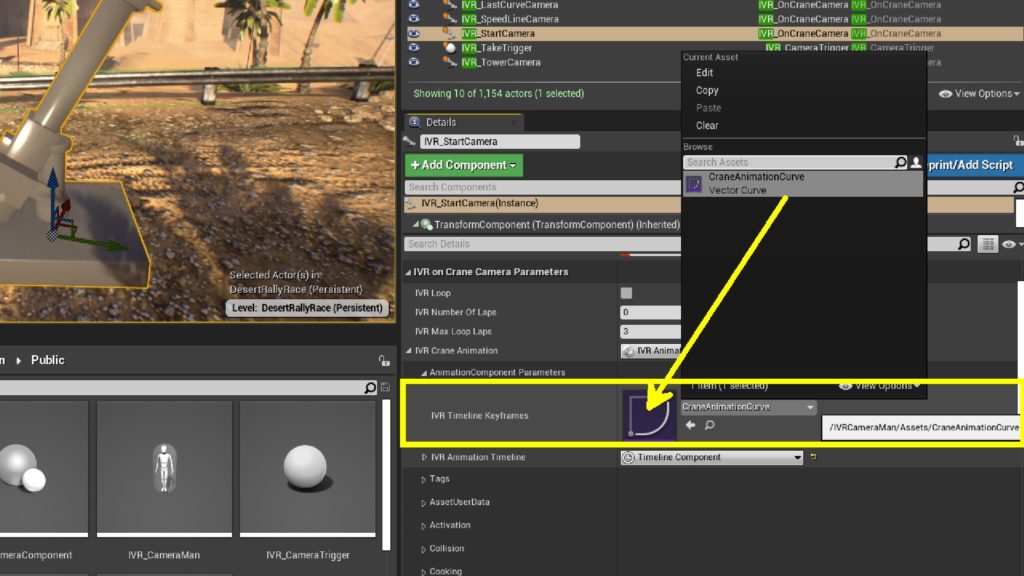
Therefore, you can create a UCurve asset of type FVector, or change the existing one so that this animation affects all existing cameras in the scenario. It is up to you to choose whether you want an exclusive animation for this camera or not.
I believe that the most important information related to camera animations is undoubtedly how we will change them and how they affect the behavior of the On-Crane camera.

Just by double-clicking on the UVector icon, we can open the Curves editor and change the animation values.
Each component of the Vector is related to a Crane attribute, which will change in real time during the animation. The total animation time is defined by the last point created in the Curve, so if the last point was created in the horizontal position 15, we will have this amount in seconds as the total animation time.
| X Component of UVector | Changes the ARM Length of the Crane |
| Y Component of UVector | Changes the YAW of the Crane |
| Z Component of UVector | Changes the PITCH of the Crane |
Try to test different types of sequences and create different animation assets to compose your arsenal. It will be important in many situations to create amazing shots!
William Wolff